/user/dologin/?next=/p/jGYVAaI4zt/
AnonymousUser
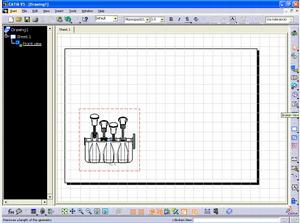
[{"fields": {"is_featured": false, "dir_size": 4112, "igdata": "catiav5 creating an is0 breakout section i created this tutorial to explain how to create isometric breakout sections in catiav5r18. this is the drafting workbench method. first you start with a front view of a 3d part or assembly as show here. then you will need find the "breakout view" command normally found under the "broken view" command. now, click on the "breakout view" command... and indicate a region over the active "front view" with the left mouse button as shown here... here... here... and finally double click here. now click "ok" if you are happy with the depth of the "breakout view". notice that the depth is displayed by the red line and the green arrow. now notice that you have changed the front view into a "breakout view". unfortunately this is only 2d. now let's make the "breakout view" 3d or i should say isometric. first you will need to find the "isometric view" command hiding under the "front view" command (if that was the last command you used). now, click on the "isometric view" command. now select window navigate back to the 3d window to select a 3d plane in which to create the isometric view from. now select a catpart or catproduct that contains the 3d geometry. simply select a plane on the 3d geometry. notice that catiav5 returns you to the drafting sheet. now simply double click on the sheet to confirm the view location. now let's apply the "breakout view" properties to the "isometric view" by first right clicking the mouse over the active "front view". first click "front view object"... and then "apply breakout to" then select the "isometric view" to apply the "breakout view" properties previously defined to the "front view". there you go...simple when you can see it step by step. <br/>", "overdue_email_after": false, "fail_retake": false, "keywords": "CATIA, Design, Drafting, Sectioning, Breakout Sections", "fail_action": "", "notification_email": false, "access_token_redemption_count": 0, "completion_type": "", "title": "CATIAV5 Creating a 3D Breakout Section", "overdue_email_after_text": null, "encoded_id": "jGYVAaI4zt", "is_viewed": true, "overdue_days_email": false, "parent_id": null, "private_views": 0, "fail_email_text": null, "status": "active", "sharing": "public", "description": "I created this tutorial to explain how to create Isometric Breakout Sections in CATIAV5r18. This is the drafting workbench method.", "tags": [24, 25, 157, 158, 159], "price": "0.00", "invite_message": null, "allow_score_reset": true, "igtype": "ignitable", "pass_email_text": null, "fail_popup_text": null, "podcast": false, "public_views": 9695, "notification_email_text": null, "categories": [7, 12, 18], "overdue_days_email_text": null, "pass_action": "", "notification_days_before": null, "access_token": null, "pass_popup_text": null, "pass_level": 0, "author": 5, "completion_date": null, "overdue_summary": false, "fail_retake_auto": false, "avgrating": "5.0", "directory": "184_1197322689640", "date_created": "2007-12-10T16:38:09Z", "access_token_limit": 0}, "model": "Content.ignitable", "pk": 184}]
None

